To disable disk check on startup Windows 10, use the Command Prompt and type “chkntfs /x C:” in two short sentences. If you’re tired of seeing the disk check every time you start your computer, you can disable it.
The disk check on startup is a Windows 10 feature that scans your computer’s hard drive for errors, and it can be helpful if you’re experiencing system crashes or other problems. But if your computer is working fine and the disk check is just an annoyance, it’s easy to disable.
We’ll show you how to disable disk check on startup Windows 10 using the Command Prompt. Follow these simple steps to remove the disk check from your computer’s startup process and speed up your computer’s boot time.
Credit: www.easeus.com
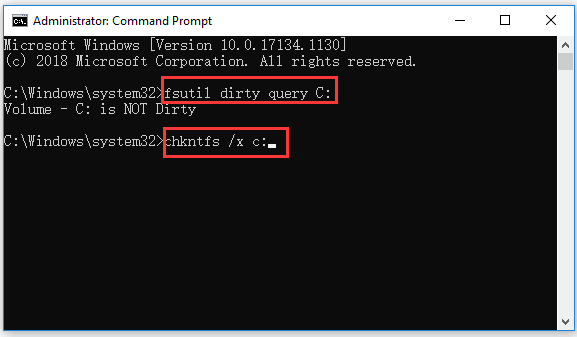
Credit: www.minitool.com
Frequently Asked Questions On How Do I Disable Disk Check On Startup Windows 10
How Do I Stop Windows 10 From Checking Disks At Startup?
To stop Windows 10 from checking disks at startup, you can do the following: 1. Press Windows + R, type “msconfig”, and hit Enter. 2. Click on the “Services” tab. 3. Check the “Hide all Microsoft services” option. 4. Locate and uncheck “Windows Error Reporting Service”.
5. Click “Apply” and then “OK”. 6. Restart your computer. This will prevent Windows 10 from automatically checking your disks at startup.
Why Does Windows 10 Keep Doing Disk Check On Startup?
Windows 10 runs disk check at startup to ensure disk health and fix any errors. This can occur due to sudden shutdowns, file system corruption, or bad sectors on the disk. Disabling it is not recommended as it may result in worsening disk issues.
Is It Safe To Cancel Chkdsk?
It’s not safe to cancel chkdsk as it can lead to data corruption and system instability. It’s essential to let the chkdsk scan complete to fix any issues with the hard drive. Cancelling it may result in various problems, so it’s better to let it run its course.
How Do I Stop A Disk Check Process?
To stop a disk check process, press the “Esc” key on your keyboard or use the “chkntfs /x” command in the Command Prompt. It will disable the disk checking process during the next system reboot.
Conclusion
Overall, disabling Disk Check on startup in Windows 10 is a simple process that can save time and frustration. By following the relevant steps outlined in this post, you can disable this automatic feature temporarily or permanently, and help your computer to start up faster.
Remember, regular backups and a well-maintained system are key components of any successful PC maintenance strategy, so be sure to keep on top of any issues before they become serious problems.