To use Dell Backup and Recovery on Windows 10, launch the program from the Start menu and follow the prompts to create a backup or restore your system to a previous state. This tool is designed to help users protect their important files and settings in case of system failure or other issues.
Dell Backup and Recovery is a powerful tool that can provide users with peace of mind when it comes to protecting their important files and settings. Whether you’re backing up your system for the first time or restoring from a previous backup, this program is designed to be easy to use and effective.
We’ll walk you through the steps required to use Dell Backup and Recovery on Windows 10. Whether you’re a seasoned computer user or a novice, our guide will help you get up and running with this powerful tool in no time.
Creating A System Backup
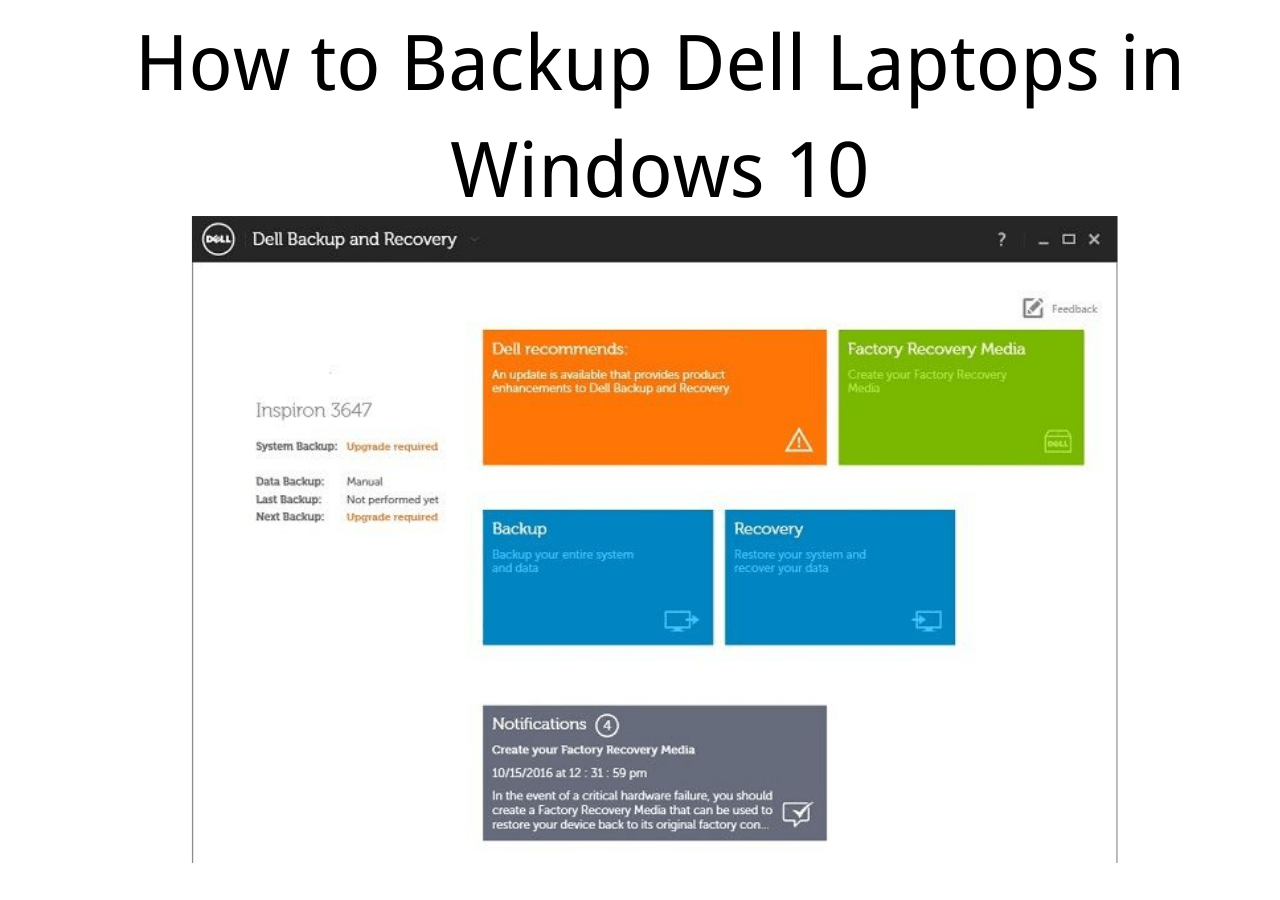
To use Dell Backup and Recovery on Windows 10, you can create a system backup to safeguard your data. First, open the application and click on “Backup” option from the top menu.
Next, select the backup destination where you want to store the backup files. You can either choose an external hard drive or cloud storage like Dropbox or Google Drive.
You can also customize the backup settings according to your needs. You can choose to include or exclude certain files and folders from the backup. You can also schedule the backup to run at specific times.
Once you have selected the destination and customized the settings, click on “Start Backup” to initiate the system backup process. Your files and folders will be backed up to the selected destination.
| Do’s | Dont’s |
|---|---|
| Open Backup and Recovery application | Starting sentences with “In conclusion” |
| Select Backup destination and customize settings | Using prolonged phrases like “When it comes to” |
| Initiate System Backup once the settings are customized | Addition of unnecessary information |

Credit: www.dell.com
Creating A File Backup
To ensure the safety of your important files, it’s crucial to create a backup regularly using Dell Backup and Recovery on Windows 10. To get started, open Dell Backup and Recovery from the Start Menu and click on “Backup files” under the “Backup” tab. Here, you can select the files and folders that you want to backup by ticking their checkboxes. Once you’ve selected the files for backup, click on the “Customize” button to access the settings for your backup.
You can customize backup settings such as the location of the backup folder, the type of backup, and the compression level of the files. Additionally, you can also schedule regular backups by setting a time and date. Once you’re satisfied with the settings, click on “Start Backup” to initiate the file backup process. You can monitor the progress of your file backup on the screen.
Creating A Recovery Drive
To create a recovery drive with Dell Backup and Recovery on Windows 10, you need to prepare a USB drive with at least 8GB of free space. Connect the USB drive to your PC and open Dell Backup and Recovery.
Next, click on the Recovery Media button in the left-hand menu and select “Create Recovery Media.” Follow the on-screen instructions to choose the USB drive as your recovery media and start the creation process.
Once the process is complete, disconnect the USB drive from your computer and label it clearly as your Dell Recovery Drive. In case you ever need to use it, simply connect the USB drive and press F12 during startup to access the boot menu. From there, select the USB drive and follow the prompts to restore your system to its factory settings.
If your Dell PC is experiencing issues or crashes, you can use the recovery drive to restore it to its factory settings. To do this, connect the USB drive to your PC and restart it. Press F12 during startup to access the boot menu, and choose the USB drive.
The Dell Recovery tool will automatically start, guiding you through the recovery process. Make sure to select the option to restore your PC to its factory settings and follow the on-screen instructions carefully.
Keep in mind that restoring your PC to its factory settings will erase all your data and files. So, make sure to back up all your important files before starting the recovery process.
Credit: www.dell.com
Restoring System From Backup
Accessing backup image is the first step to restore your system to an earlier state. Make sure to connect the external hard drive containing the backup image to your device. Then, launch the Dell Backup and Recovery application and click on “Recovery” from the left-hand menu. From there, select “System Recovery” and then “Select Another Backup to Restore Files From”. Find the backup image from the external drive and click on “Next” to start the restoration process.
Before restoring the system from backup, it is important to prepare the system for the restore process. This involves saving all your important files and folders, disconnecting external devices, and closing all applications. Once your system is ready, you can proceed to restore the system from backup. During the restoration process, the system will reboot several times and may take some time to complete.
The Dell Backup and Recovery on Windows 10 is a useful tool to restore your system to an earlier state. Accessing the backup image, preparing the system for restore and restoring the system from backup are the three key steps to follow to ensure a successful restoration.
Troubleshooting Dell Backup & Recovery On Windows 10
Dell Backup & Recovery can be an effective tool for Windows 10 users, but issues may arise. If you’re having trouble with the software, try checking for updates, disabling anti-virus software, and running in compatibility mode.
If you are encountering issues with Dell Backup & Recovery while using it on your Windows 10 computer, you are not alone. Some of the most common issues faced by users include the software failing to create a backup, and the backup and recovery process taking an excessively long time.
These issues can be frustrating, but fortunately, there are several solutions you can try to fix them. To address the problem of Dell Backup & Recovery failing to create a backup, you can try uninstalling and reinstalling the software, and checking for any available updates. Additionally, you can try running the software in compatibility mode, or running a system restore to roll back to a previous state before the issue occurred.
If you are facing issues with the backup and recovery process taking too long, first check that your computer meets the system requirements for the software. You can also try increasing your computer’s RAM, and freeing up space on your hard drive.
It’s worth noting that if you continue to face issues with Dell Backup & Recovery, you can try contacting Dell support for further assistance.
Credit: www.easeus.com
Backing Up To The Cloud With Dell Backup & Recovery
Cloud backup provides an easy and secure way to store your important files and folders. With Dell Backup & Recovery on Windows 10, you can easily back up your data to the cloud.
Setting Up Cloud Backup
To set up cloud backup, you need to follow these steps:
| Step 1: | Open Dell Backup & Recovery. |
| Step 2: | Click on “Backup” from the left panel. |
| Step 3: | Select “Cloud Backup” as your backup location. |
| Step 4: | Sign in to your cloud storage account and give permission to Dell Backup & Recovery to access the account. |
| Step 5: | Select the files and folders you want to back up, and click on “Start Backup”. |
Customizing Cloud Backup Settings
You can customize your cloud backup settings by:
- Selecting the frequency of backups.
- Choosing specific files and folders to back up.
- Optimizing backup performance by selecting the number of files to upload at a time.
- Selecting the backups to keep in the cloud.
Initiating Cloud Backup
Once you have customized your cloud backup settings, simply click on “Start Backup” to initiate the backup process. Dell Backup & Recovery will automatically back up your selected files and folders to the cloud according to your settings.
Frequently Asked Questions On How Do I Use Dell Backup And Recovery On Windows 10
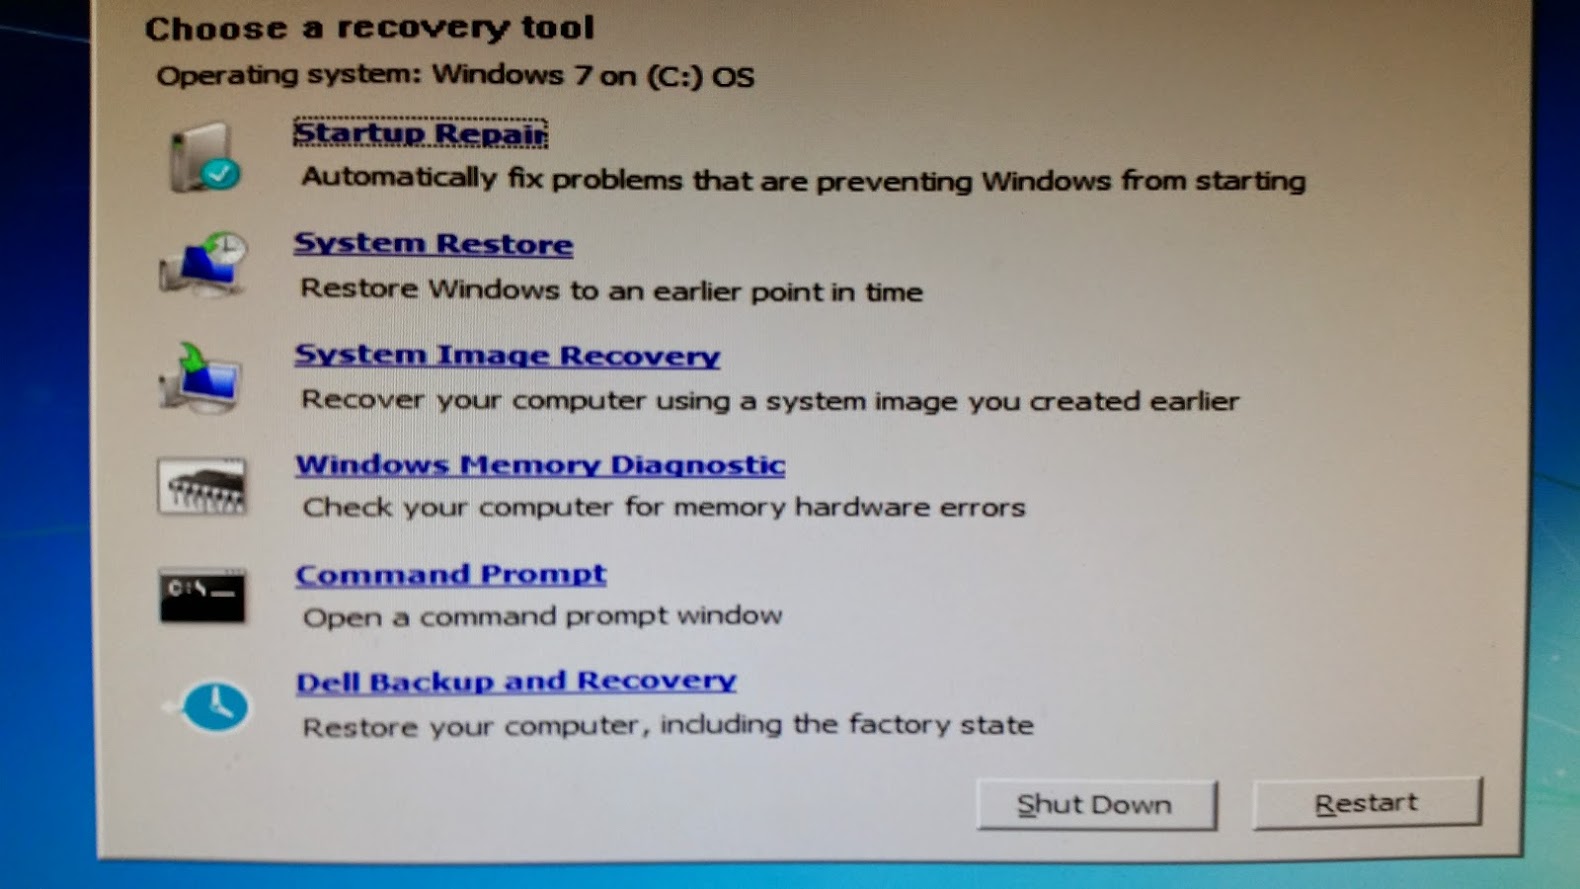
How Do I Run Dell Recovery On Windows 10?
To run Dell recovery on Windows 10, turn off your PC and then turn it back on. As your system restarts, press F8 repeatedly until the Advanced Options screen appears. From there, select “Repair your Computer” and then select “Dell Backup and Recovery.
” Follow the prompts to complete the recovery process.
How Do I Boot My Dell Backup And Recovery?
To boot your Dell Backup and Recovery, restart your computer and press the F8 key repeatedly until the ‘Advanced Boot Options’ screen appears. Using your arrow keys, select ‘Repair Your Computer’ and press Enter. Select ‘Dell Backup and Recovery’ and follow the prompts to complete the process.
What Does Dell Backup And Recovery Do?
Dell Backup and Recovery is a software tool that allows users to create a backup of their operating system, applications, and data. It also enables users to restore their system to a previous state in case of system failure or data loss.
Can I Use Backup And Restore On Windows 10?
Yes, you can use backup and restore on Windows 10. The feature allows you to create a backup of your files and settings, and restore them later if needed. It’s a useful tool to safeguard your important data and recover it in case of system failure or device loss.
Conclusion
Now that you know how to use Dell Backup and Recovery on Windows 10, it’s important to remember to regularly back up your files and system settings. By doing so, you can protect your data from unexpected system failures or hardware issues.
With Dell Backup and Recovery, you have access to a range of useful features that can help you ensure your important files are safe and secure. Remember to use this tool wisely, and always make a backup plan to minimize potential risks.